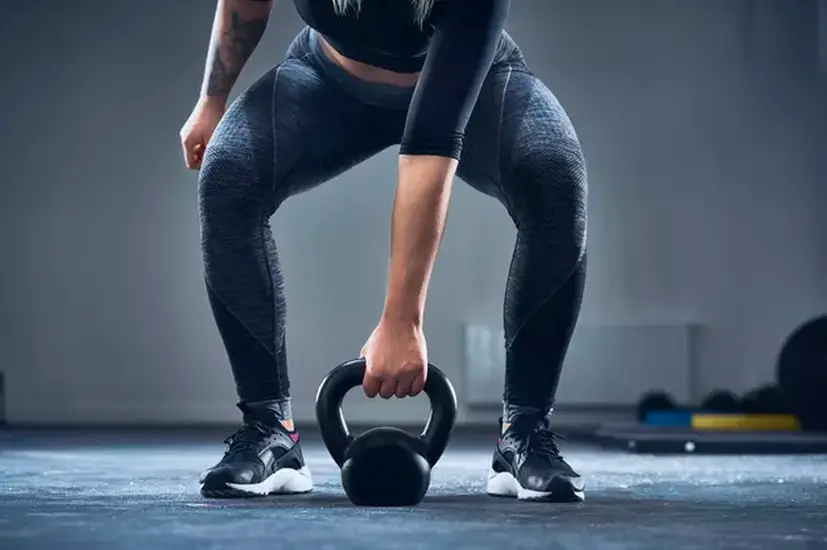
 Don't waste your time with ineffective leg exercises. Image Credit: Westend61/Westend61/GettyImages Here's the hard truth: Not all leg exercises are created equal. Whether your goal is to get gorgeous gams, build lower-body strength or increase your endurance as a runner, you don't want to waste your time or energy or risk a potential injury on ineffective, inefficient leg exercises.
Here , Geoff Tripp, CSCS, certified personal trainer and head of fitness at Trainiac, shares five ineffectual moves to cut from your leg day, plus what to do instead for a fitter, stronger, more powerful lower body. 1. Leg Extension Machine What the leg extension machine lacks is functionality, Tripp says. "There aren't many times in the day when we sit locked in a machine and extend our legs in an isolated fashion," he says. Conversely, we usually do complex movements that involve many muscles in our quads, hips and glutes. Think: lunging forward to pick something off the floor or climbing the stairs. That's why "performing multi-joint exercises for your lower body muscle needs is ideal," he says. Instead: A great replacement is a squat, Tripp says. The mother of all functional exercises, squats are compound movements that recruit many muscles, help you build strength for the physical demands of daily life and lower your risk of injury.
2. 45-Degree Leg Press" Another move that takes a functional movement pattern and locks you in place, the leg press is great for pushing a lot of weight but doesn't transfer into real life unless you are lying on your back and pressing cars all day," Tripp says. Plus, people have a habit of overloading the weight, which adds to the potential for injury. Instead: A fantastic functional exercise, goblet squats will work your lower body in a multi-joint way, plus the movement translates to everyday situations, he says. Anyone who's ever bent down to lift something off the floor will understand. And there's a bonus: you'll get a good ab workout too. A June 2013 study published in The Journal of Strength and Conditioning Research found that performing multi-joint moves like squats is a more effective way to train your core than abs-focused movements.
3. Lying Leg Curl Machine A machine like the lying leg curl only isolates a muscle at a specific joint and range of motion, Tripp says. That's why it's best incorporated as a tool for rehabbing a particular muscle — not for those looking to build muscle or improve their overall fitness. If you're not recovering from an injury, you should focus on functional, compound lower-body movements to target your posterior chain muscles (the ones that run along the back of your body). And to do that — and train your hamstrings and glutes effectively — Tripp says you need to be standing on two feet, not lying down on a machine. Instead: Deadlifts (and their many variations) are the best move for multi-joint, lower body posterior muscle recruitment, Tripp says. Doing deadlifts helps you develop the strength you need for everyday bending and balancing.
Tip Remember, it’s all in the hips. “If you feel your back working too much in your deadlifts, then you’re likely not hinging properly at your hips,” Tripp says. 4. Standing Calf Raise Machine Unless you're rehabilitating a strained calf muscle, there's no need to train your calves in isolation, Tripp says. "Again, isolated movements like these don't teach your body proper muscle recruitment," he says. Instead: To be efficient with your time and training, try incorporating more plyometric movements into your workout. Plyo moves like jump squats require extension of the ankle joint, which engages the calf muscles, Tripps says. That's why these exercises are great replacements for the standing or seated calf raise machine. Dynamic moves like squat jumps also get your heart pumping and recruit multiple muscles. "There's a lot of force at play, both at takeoff and at landing," he says. Plus, you can control the difficulty level of the exercise — the higher you jump, the harder it'll be.
5. Seated Thigh Machine (Adductor and Abductor) "This machine does a great job at isolating the muscles at the joint but does little to teach the body how to use the muscles in a practical way," says Tripp. "The adductor and abduction muscles are used to support the hips during multi-joint movements, so we want to try our best to work them in a functional position, i.e., standing." Instead: Tripp recommends the standing cable machine for abduction and adduction exercises. "Here we promote stability in a standing position as well as recruitment of these muscles and awareness of how they work to stabilize the hip," he says. Tip If you don't have access to a cable machine, you can substitute with a resistance loop. Move 1: Hip Abduction
Move 2: Hip Adduction
ReferencesThe Journal of Strength and Conditioning Research: “Systematic Review of Core Muscle Activity During Physical Fitness Exercises.” The opinions expressed here by Bergen Review Media columnists are their own, not those of Bergenreview.com. If you don't exercise regularly, consult a physician before trying any of these exercises
0 Comments
How to Use a Rowing Machine Correctly—Because We’re Definitely All Making the Same Mistake6/12/2021 Kells McPhillips 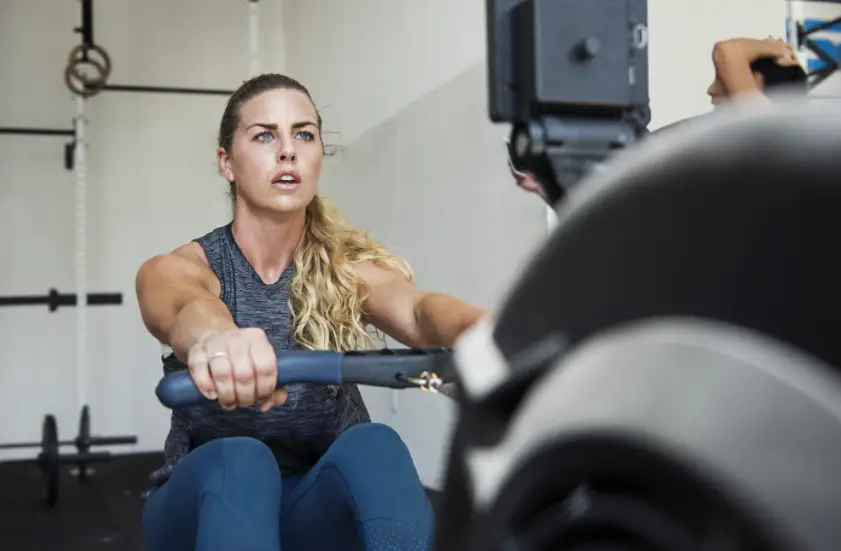 Almost all novice rowers make the same mistake within seconds of strapping into a rowing ergometer, says world-class rower Libby Peters, the former associate head coach of the University of Pennsylvania women’s rowing team. As a member of the U.S. National Team, Peters won a bronze medal at the 2008 World Rowing Championships. Needless to say she knows how to use a rowing machine properly.It’s not entirely intuitive, but with practice, rowing becomes as natural as, say, breathing. And now that it’s no longer a sport reserved for Ivy League athletes, rowing machines have finally found their way into fitness studios throughout the country. From New York’s City Row to high-tech at-home equipment, strokes are becoming as ubiquitous as cycling or running. But perhaps rowing’s greatest appeal is the uniquely low-impact efficiency of the movement. While providing a great full-body workout, a rower is designed primarily to target your legs—but the most common mistake is that too many people task their arms with all the work, pulling with all their might, says Peters. She recommends rethinking the way you approach the exercise. “The thing to remember about rowing is, it’s basically like you’re lifting like a heavy load,” says Peters. “When you’re in a boat, the load is you and the boat itself; when you’re on the erg, the load is the resistance being created by the machine.” (I don’t know about you, but this was an “aha!” moment for me when I heard it.) Below, Peters explains how to fix your rowing form. With practice, the rowing machine promises to become one of your favorite pieces of equipment Wondering how to use a rowing machine properly? Learn from a world-class rowing coach Before you sit down on the sliding seat, make sure the adjust rowing machine’s damper setting. This mechanism, located on the side of the machine, determines the resistance level. Set it to level three, four, or five. Cruising at these lower speeds will keep you from hurting yourself when you’re just getting your sea (land?) legs, according to Peters.
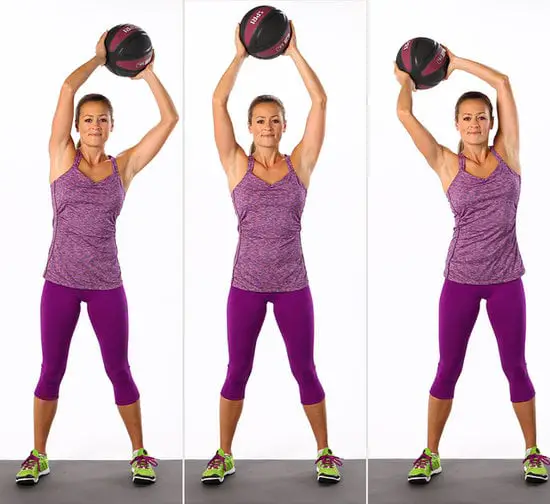
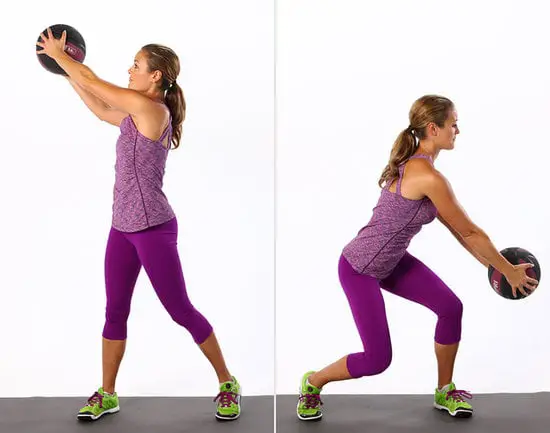
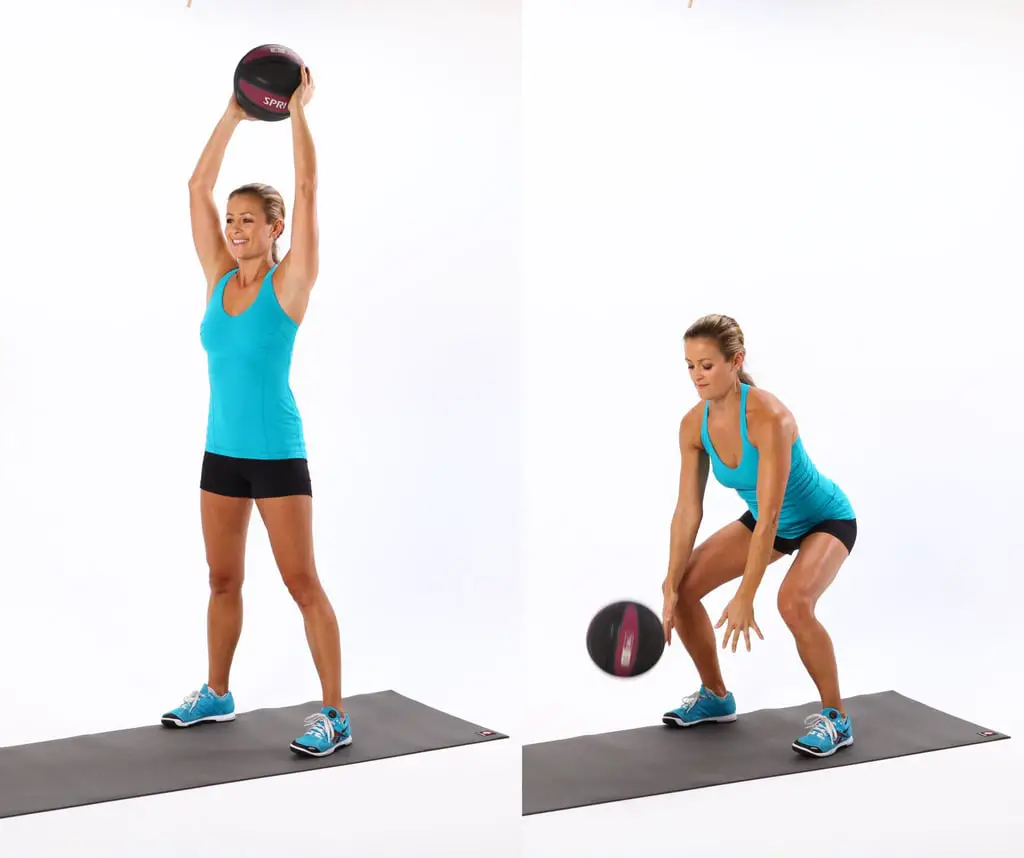
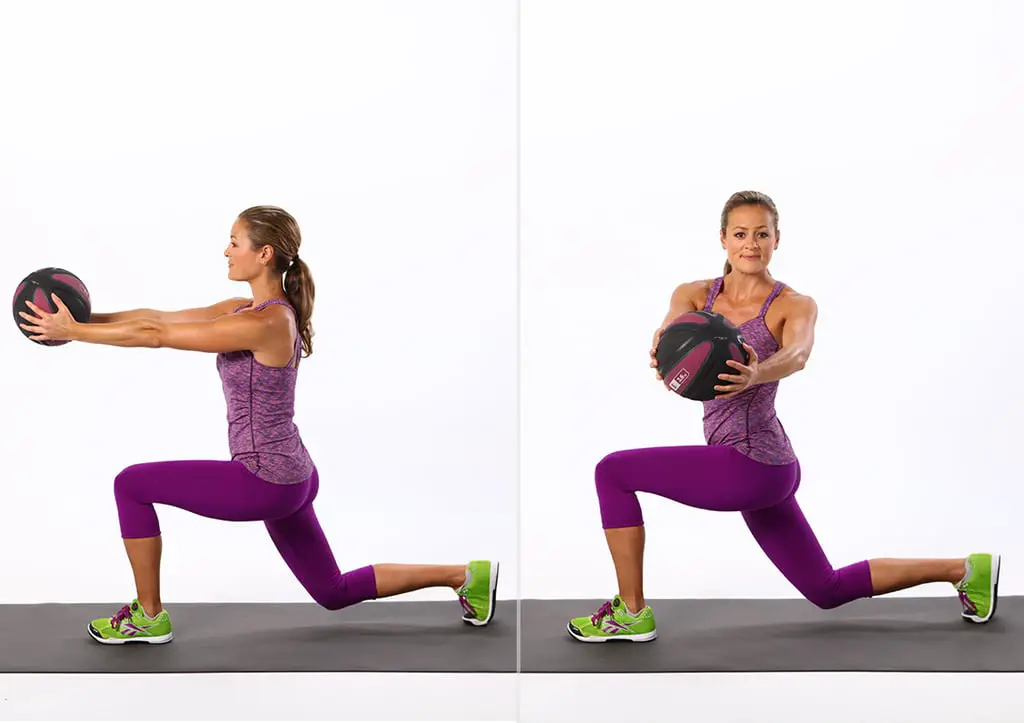
Try out your new form with a 12-minute rowing workout“I always recommend starting with intervals,” says Peters. For a quick-hit cardio session, alternate every 60 seconds between slow strokes that focus on strength and proper form (shoot for 16 to 18 strokes per minute), and strokes that are more casual as your active recovery. Go back and forth between the two for 10 to 12 minutes. “I really like interval workouts for young or new athletes,” she says. “I think you get more out of it by doing higher quality with shorter time or shorter distance.” Speaking of gym machines that we love, this one gives you a full-body workout in a single move and the secret to giving your booty a boost on the treadmill.  When you want a feel-good, low-impact workout that also makes you work up a sweat in minimal time, there’s one answer: power yoga. Unlike your traditional calming flow, it’s basically a high-intensity form of yoga that focuses on cardio and strength-building. Hello, full-body burn. There Are 38 Million Power Yoga Videos—These Are the 9 Best You Can Do in 10 Minutes or Less 1. Rebecca Louise 10-minute full-body power yoga workout The nice thing about this power yoga circuit is you can make it as easy or as hard as you want. 2. Deliciously Ella sweaty 10-minute fire flow You’ll definitely get your cardio in with this fun—yet challenging!—flow. 3. Five Parks Yoga 10-minute power yoga class This power yoga video isn’t for newbies. If you’re still working on your balance, you might want to start with another option. 4. Yoga With Bird 5-minute morning yoga power flow Only have 5 minutes? Then this morning yoga power flow is the perfect way to start your day 5. PsycheTruth 10-minute power yoga workout If you’re looking for a beginner-friendly option, this is it. This workout specifically helps strengthen your arms and core. 6. Yoga by Candace 10-minute power yoga vinyasa If you’re a fan of headstands, you’ll have a lot of fun with this power yoga vinyasa workout. If not, you might want to skip it until you get it nailed down. 7. Yoga with Kassandra 10-minute cardio yoga workout You’ll definitely work up a sweat in this booty, core, and upper body-focused power yoga flow. 8. SarahBethYoga 10-minute power yoga workout for abs You’ll get in a killer core workout in this power yoga workout that will make your abs feel like they’re on fire. 9. Koya Webb 10-minute HIIT yoga This workout combines traditional yoga with HIIT movements added in to give your metabolism a boost. These are some of the most common mistakes people make with yoga: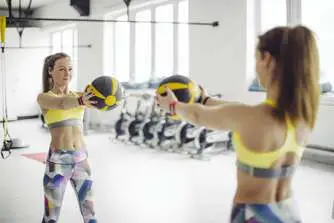 Doing ab exercises with just your body weight can be challenging in itself. But when you bring extra pounds into the equation, it's a whole new kind of burn. As celebrity trainer Gunnar Peterson told POPSUGAR in a previous interview, the secret to great abdominals is "working consistently, working in different planes of motion, and adding weights to your abdominal work." Ahead, check out exercises to target your abs with a medicine ball specifically — because medicine balls are easy to hold and even easier to store. Class FitSugar host Anna Renderer also says they're great for working your hand-eye coordination. To get started, choose the weight that's best for you and your fitness level — here's how to do that — though we'd recommend anywhere from 6-15 pounds. Do note that this is not a workout; you can add some of these into your next core or full-body routine to really shred that six pack. Plus, watch an explainer video with more moves from Class FitSugar at the end. If you're looking for a true test of strength, check out this medicine ball circuit from Jillian Michaels.
5 Flat-Belly Moves Using a Medicine Ball
|
Written, Compiled & Edited byThe Bergen Review Media Team
�
Archives
April 2024
Categories
All
|


 RSS Feed
|
Vertical Divider
Bergen Review Media was Named Best in Search By TOP SEO's

|
Vertical Divider
|
Vertical Divider

|
WE'RE MORE THAN A MEDIA GROUP
WE'RE PART OF YOUR COMMUNITY |

|
|
Bergen Review Media is a
WebClientReach, llc Company |

50 East Ridgewood Ave. #215
Ridgewood, NJ 07050 Phone: (201) 948-5500 |
The Bergen Review is Bergen county's concierge for the best businesses, restaurants & venues in New Jersey. Our agency has a combined total of over 15 years experience in online media and marketing. Our team of experts scour every nook and cranny of New Jerseys best businesses, restaurants & venues to present to our clients the full scoop of where best deals & experiences are. Even after researching & looking at reviews, finding the REAL scoop on what Businesses, restaurants or venues best fit your interest can be a challenge. Bergen Review Media has a team that researches & visits various establishments. Making sure the consumer gets the best experience.
|
Website by Bergen Review Media